Friday, December 12, 2008

Christmas Treats


Here is just an idea, in case you are stumped and are looking for an easy way to wrap up some holiday goodness for friends and neighbors. It's quick, easy, simple, inexpensive, and cute! Just what we need things to be this time of year.

These take out boxes can be found at the craft store in a variety of colors and designs for about $1.25. I made snowflake fans using some Amy Butler scrapbook paper and made gift tags to be tied on the handle. Another idea is to spray paint the lids to mason canning jars and fill the jars with the treats. This year I used Ivy Leaf Krylon spray paint for the lids and added the snowflakes and tags. It's just as cute, and a little cheaper way to go since you can find a dozen of canning jars fairly cheap.

The boxes were of course filled with my families favorite traditional holiday treat...homemade peanut butter balls! It's always fun to drive the girls around at night listening to Christmas music, delivering goodies and seeing all the neighborhood Christmas lights and decorations!

And who doesn't love receiving Christmas treats?

Monday, November 17, 2008

Holiday Party Skirt


Tis the season for fancy, frilly and foofy. I saw these adorable holiday party skirts at places like Gymboree, Gap and Crewcuts, but seriously refused to pay anywhere from $30-$90 for them. Plus, my favorite holiday color is this wonderful lime green color and I wasn't seeing any skirts in this shade green. I can't get enough of it, and it's nice to be different. So I went to the fabric store with my coupon in hand and bought a yard of this perfect green taffeta and a yard and a half of matching lime green tulle. I wasn't quite sure how I was going to come up with the skirts, but I bought the stuff anyway.
Luckily, I was led to this tutorial and knew right away what to do. I basically followed the sewing instructions, but subtracted the different layers of fabric and added tulle to the sewing. Because I bought the fabric first, I ended up having to make Gabriella's with lots of pleats in the taffeta and only one layer to tulle, and Gwen's with less pleats but three layers of tulle. Both are equally as fluffy, and I saved a trip back to the store. Thank goodness!
In doing these super fun skirts, I learned how to use my gathering foot and over lock foot, which has opened a whole new world of sewing for me. If I wasn't already addicted to gathers, ruffles and pleats, by doing them by hand, I sure am now! So all in all, each skirt, $7 and a few hours labor. And I don't have to take them to the dry cleaners, taffeta is machine washable and it can be ironed. Bonus! I think my girls might have one in every color and for every season. So fun.

Friday, October 31, 2008

Maternity Skirt


I was facing some major maternity skirt woes. Bryn and I have shared maternity clothes and have quite the extensive wardrobe. I love it. However, over the past 4 years of maternity clothes shopping between the two of us, we have only ever bought 1 maternity skirt. The skirt is black and great, but this time around I'm pregnant through the winter and it just wasn't going to cut it with boots. And you don't want to see these legs outside of boots during winter. Trust me.

I tried shopping and realized that I am very particular about the way skirts fit and all the maternity skirts I was finding (which was only one by the way) was above my knee and flowy. I don't do flowy. I'm too stick thin and tall. I was desperate. And desperate times call for desperate measures.

I searched the Internet for a maternity skirt how to. I have never made any clothing for myself so this was a long shot to make maternity wear, but I had to try. I found what looked to be a super simple tutorial and thought I'd go for it. The next day I happened to find this great wool at a Thrift store for $2. What better to experiment on than cheap fabric? As a little secret, I buy fabric at thrift stores all the time, you can't believe the neat, cheap stuff out there.
Any way, I used an old tent style maternity shirt for the knit waist band, elastic I had, silk for the lining I had and went to work.
Two or so hours later I had something pretty acceptable. I bought some lace to add to the lining for a little extra length, style and to protect my legs from that crazy, itchy wool. The sewing isn't perfect. I didn't use a skirt pattern, I just used the measurements of one of my favorite non maternity skirts and went from there.

Now that I made a great skirt for about $2, I can't wait to go to the actual fabric store and get myself some tweed and herringbone for a few extra Sunday skirts! I wanted to share because I know I can't be the only one who has found themselves in this position and it is so easy to do!

Monday, September 29, 2008

MacGillivray Family


Honestly! I couldn't look at those 4th of July dresses one more second. I am holding off all crafting projects until we find out what we are having. Then I will be in full sewing mode. I promise.

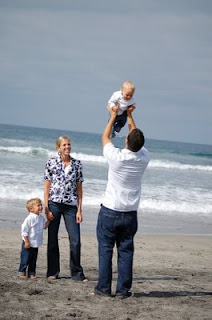
For now, let me share with you a quick, little photo shoot I did for my sister's family at the beach. They couldn't possibly be any cuter! I love these boys to pieces! I wish I could share more, but Bryn has the memory card! She's keeping some pictures secret for Christmas cards...sneaky little thing.
I know we don't have the beach here in Washington, but Puget Sound is beautiful. So if anyone else is looking for a Christmas photo shoot...

Thursday, July 3, 2008

4th of July Dresses


I went through a couple of years having a hard time finding anything I loved for the girls to where on 4th of July. Picky I guess. So this year I decided I would make the girls something a little different than the norm. (I debated whether I should even post these pictures or not. The dresses look much cuter on. If you want to see them on and in action, look to my family blog soon for a 4th of July post).

My very fun sister Nicole, who always keeps an eye out for fun things to make, sent me this tutorial awhile ago. I loved the idea and thought a 4th of July halter shirt would be perfect. I splurged and bought 1.5 yards of fabric from a great high end store near by called Wal-Mart for 1.99 a yard. I planned on making the girls shirts with the flag print fabric and using the stars fabric for straps and trim. Once Gabriella saw the fabric, that changed and she wanted the stars for her shirt.

I made her shirt and adjusted the straps, because I didn't care for them coming from the middle of the shirt. I opted to make Gwen's into a dress and just make hers with criss-cross straps. Once Gabriella saw that Gwen had a dress, she changed her mind and wanted a dress too. So, I took the rest of the fabric and made a wide, loose ruffle trim to go along the bottom. And then I loved it.

We went today to pick out buttons for details and again Gabriella had an opinion. Gold it was. She designed her dress herself, and I am so proud of her. She knows what she wants, and I'm grateful for that. I can't wait to see the girls in them both at the same time. I know the sewing is simple, but I love taking an idea and making it fit my personal taste (and Gabriella's) and seeing what comes of it.

Sunday, June 22, 2008

Card Table Playhouse Tips


I used our piano bench and made a home for puppies and dolls that match the girls new playhouse. This playhouse was much, much easier and much quicker to make because I didn't add any windows. I opted to make a tent style door with two panels instead of the door flap like in the playhouse. It was a breeze to make while Gwen napped.

I thought I would post a How To Make A Card Table Playhouse with tips and hints for those curious minds out there. I tried to find some for myself when I was making mine, but didn't come up with any. So I didn't use a pattern or a tutorial for my English Cottage Playhouse. I would love to include a tutorial, but I don't have a plan to make one again any time soon, so I'll just share with you the basics from what I learned from doing mine. Hopefully with these simple guidelines you'll be on your way to creating a fabulous playhouse for your little ones.

- Your table playhouse can be made for any table size you want. Square or rectangle. I don't think a bigger table will result in a more difficult experience, it just may take longer to sew. Especially if you will be adding more than 1 window per side.

- First measure the table top length and width. Add two inches to each measurement when cutting fabric-I say fabric, but sheets work great and is much cheaper.

-Measure each side of your table lengths. Measure from the table top to the ground. Add one inch to each measurement and cut fabric.

-Label each piece that is cut so you remember what it is and where it goes. This is especially important if you are cutting coordinating fabric to line the tent with.

-Cut and sew your windows. Just a tip about the windows...don't make your window too big or too close to the bottom of your playhouse. If you do it starts to sag and doesn't hold it's rectangular shape. For the windows I simply cut a rectangle in the fabric, then cut slits in the corners, folded them in and sewed.

-Cut and sew your door. For the playhouse door, I cut slits in the fabric and made as small a seam allowance as I could and sewed so there wouldn't be a gap. For the puppy house, I measured the front of the piano bench and added 2 inches. I cut that piece in half, then sewed in the raw edges.

-Cut and add any borders to each individual piece.

-Start sewing the front door to the side walls and then to the back wall.

-Finally, sew the roof to the entire structure.


* It's important that you don't sew the walls and roof together before you sew in windows and the door. Trying to sew in the window and doors with that much fabric sewn together is hard work. So complete each panel fully before sewing it all together.

* I also lined the entire playhouse which is nice to give it a little bit of a stiffer structure, but not necessary. It also makes it a little darker inside which may be something you would or wouldn't like.

I hope that with these beginning tips, you can come up with the rest. I love the idea of these playhouses, because you can cater them to your child's personality...boy or girl. You can make one that looks like a pirate ship, or a barn. Or you can have a castle looking one or a ladybug house. If your child is obsessed with Cars or Dora, buy those sheets. Whatever it is your child loves, you can probably translate into a great little playhouse for them. Please share any that you make...I'd love to see them!

Wednesday, June 11, 2008

Table Playhouse Tent


When I saw the idea of a fabric playhouse tent to go over a card table, I had to do one. I thought it was the best idea ever. The girls are always trying to build homes out of pillows and blankets, and I thought that they would love an actual little playhouse. Luckily, my friend Jen wanted one for her kiddos too, so we were able to tackle them together.

I knew sheets would be the cheapest way to get the amount of fabric I needed, so I set out to find the perfect set. I never saw anything I loved that wasn't $30-$40 dollars. Those who know me, know I'm kinda thrifty (aka cheap) when it comes to that kind of stuff. I hate spending money on something, when I know I don't have to. But, I did remember a Pottery Barn duvet cover I bought at a garage sale a few years back that I never used. It was too cutesy to ever put in our bedroom, too matronly to put in the girls room, and too frilly to use in a guest room. I have looked at it several times for other projects, but I never liked it. I guess it was never the right project, because for some reason when I pulled it out again for this project, I loved it! I thought it would make an adorable playhouse.

I gave Gabriella the choice between if she wanted pink or orange coordinating colors. She choose pink. Shocker! So I bought a pink twin sheet set for $7.99 at Ross that I used to line the inside (yes, I'm crazy, I lined the entire thing) and for the roof. The pink pillow case was used for the drapes in the windows on both sides. As I was searching for the right color sheets, I saw a pink scalloped twin bed skirt for $4.99 that was perfect for the banner. I had no intentions of making the door frame, but there was a slight gap between the door and walls from the seam allowance, so I used the bed skirt to frame the door. I added the ribbon on the windows and door so they could be tied up. I also attached the flowers to add a little fun to it.

The girls have loved it so far. They especially love jumping in and out of the windows, which resulted in a tear. I'm sure it is only the first of many patching that I'll have to do.

It only took me about a day and a half to do it. It was nice having my friend over so I wasn't feeling guilty about neglecting the girls. We did feed them during the day didn't we Jen?
Honestly though, it was one of the most fun sewing projects I have done. I loved it. It was like I was making my little dream house once upon a time for my little girls. Jen so cleverly called it an English cottage. I liked that. So, here's my $13 English cottage. Much better than the $200 ones I found on line.

Wednesday, April 23, 2008

Stick Horse


When I was pregnant with Gabs some ladies at church were making these adorable stick horses. It sounded like a cute idea, but I was about 48 hours from giving birth, so I never gave them a second thought. Luckily I had two of the greatest friends that came galloping over the day I got home from the hospital with a stick horse they made for my new little girl.

A couple years went by before our little pink and purple horse got any use. Finally Gabriella was interested and hasn't stopped "Knee-Ha-ing" since. It is one of the prized attractions when friends or school is held at our house.

I thought it was time that Gwen had a little friend for our pink and purple horse. I predicted that Gabriella would claim the new one and leave the older one for Gwen (poor Gwyneth), so I let her choose everything. The yarn. The fabric. And the ribbon. I made it last Saturday while Joe was gone and the girls helped stuff their new horse. Gabs thinks "she" is pretty nifty. And it's a good thing too because apparently the other one Gwen is now allowed to play with bites. Go figure! Gwen doesn't seem to mind though and is as pleased as can be that she has a horse now too.

I have the instructions for these horses, but I don't feel like I should leave them on the Internet since I don't know where they originated from. If you'd like a copy, leave your e-mail address and I'll get them to you.
I hope I got the instructions to everyone who requested them. If I missed you somehow please let me know. I will no longer be e-mailing the instructions out to anyone. Thanks!

Monday, April 21, 2008

Burp Cloths


Again, I have never claimed to doing anything fancy or anything that original. This here is no exception. But I'm posting it anyway. This is for anyone who doesn't have a baby, has never been to a baby shower, or pretty much has never seen a baby. These are the best and easiest burp cloths in the world. A little cloth diaper and some fabric or ribbon and you're set. They're great because they are super absorbent. I love simple ones with only ribbon running down the center seams. But they're also really fun to gussy up a bit with some personal monogramming and velvet ribbon. You can also line the middle with some great throw back fabric inspired by the 50's, or use bold, bright colors that have nothing to do with babies what so ever. I love them all. My mom and I found some Dick and Jane fabric and thought it was perfect for a bib and burp cloth set. They are super fun, super quick, and super cheap to make...way better than the $15-$20 sets found at boutiques!


Anyway, just in case you've been under a rock....

Wednesday, April 16, 2008

Summer Shirt


Having my mom in town is the best. We go to all the fabric stores within a 50 mile radius and load up on all kinds of deals. Joe watched the girls one afternoon and my mom and I set out to my favorite fabric store. No more full price fabric for me anymore. I'm sticking to the reduced, already cut bins and the "Bits and Pieces" collection in the corner of the store. The bits and pieces are pretty small, but for .99 cents, it's prefect for a contrasting bodice, sash, or straps. My favorite fabric store also has a shelf with "baby bolts" on them. They are the last bit of fabric from the bolt that they place on a baby bolt. You have to buy the whole baby bolt, but it's usually about a yard. And it's 20% off!

I saw this fabric on a baby bolt and it was in my cart within seconds of walking into the store. With my .99 cent bits and pieces fabric for the bodice and some left over Easter dress fabric for a little ruffle, I was able to make Gabs a new shirt for summer. She wanted a pocket, so I used the last of the bodice fabric for a pocket and now she's bright and summery even if the weather is not.

I'm hooked on trying to sew more clothes. I love originality. And I made this for $5. You can't beat that! Here's to trying to make more clothes!

Wednesday, April 9, 2008

Leg Warmers


I must say, I am not a huge fan of the 80's trends making a comeback. Not a fan at all actually. However, if you are talking about the 80's leg warmer trends for little girls who refuse to wear anything but skirts in this cold, wet state we reside in, I'll make an exception. In fact, I think they're pretty darling.

I found a tutorial here on how to make leg warmers for little babies and toddlers from girls knee-high socks. I'm addicted! It literally takes minutes and I can't stop making them.

I haven't had the luxury of shopping knee-high socks anywhere fancy, so the current 2 for $1 socks at Wal-Mart will have to tide me over. Thankfully Gabriella loves them and willingly puts them on. By herself I must add! No more hassling with tights. Just good old fashion leg warmers! I love it!

Monday, April 7, 2008

Library Tote


Well, it hasn't been because I haven't been crafting that I haven't posted anything. I just keep forgetting to take pictures. I've made a birthday cape for my nephew, tu-tu's for a few little birthday parties, a few more crayon rolls, and a shoulder tote for my niece. Gabriella thought the fun pink and orange tote was for her, so when I told her it wasn't, I had to act quick. I unloaded my stash of fabric and told her to pick what she pleased. She choose some orange and purple Amy Butler flannel that was suppose to be receiving blanket for Gwen. Obviously that didn't happen, so that's what we used. I found a tutorial here and adjusted the measurements to make a library tote for her. Gabriella quickly dumped out the books and threw all her babies, dozens of diapers and as many handfuls of wipes she could get away with, flung it over her head and shoulder and carried on calling it her diaper bag. I guess that's as good as anything. But it sure did come in handy today when we returned 5 books to the library and picked up 9 more and 3 DVDs.
I promise to take pictures and post my current projects in the works.

Thursday, March 20, 2008

Spool People


I have been working on these little guys for 3-4 hours a night since Sunday. They were fun, but oh, how happy I am to be done with the Easter gifts. It's been a love-hate relationship.

I first spotted them on etsy. I loved them immediately. They reminded me of the old school Little People that I played with when I was little. The girls absolutely LOVE playing with them at grandma's house. Round body, no arms, no legs, and a head. Somehow, limbless, they're still the favorites .

With my obsessive compulsive disorder kicking into high gear, I called my mom, mother-in-law, and grandma within minutes to see if they had any old wooden spools. To my delight, they all did. My mother-in-law sent me all she had and my mom let me pick out a dozen or so of my favorites from her collection. Both my mother-in-law and moms spools came from their moms. So each doll is made from the old sewing spools that the girls great grandma's, Ola and Mable, actually sewed with. I marked on the bottom with an "O" or "M" so we will always remember where they came from. My other grandma just had back surgery so I'm hoping when she's all recovered I can make a few more using her spools as well. Three different great grandmas spools...what a legacy! It makes me so excited! I just love one of a kind things with sentimental value.

I made a set with three beds, 2 tables, and 20 spool people: 1 Grandpa, 1 Grandma, 1 Joe, 1 Jamie, 1 Gabriella, 1 Gwen, 10 friends, 3 Bears, and Goldilocks. I don't think I'll ever tell the girls who is suppose to be who, I'll just let them use their imagination to pretend how they want.

The doll house is actually a CD holder dollhouse from Michael's. I got the idea here and thought it would be perfect. Small and put-awayable...yes, I made that word up, but that is a huge criteria for toys around here. Can it be put away so I don't have to look at it all the time? Yes? Okay, good, I'll take it.

I hope the girls enjoy their town full of spool people. I'm thinking I might put a few in Easter eggs and hide them along with the other eggs. We'll see. But for right now, I'm just glad I don't have to paint another face on any wood heads for a while. Not so crafty with the paint brush over here!

Wednesday, March 19, 2008

Surprise

Surprise is right!

If you want to see what knocked my socks off the other night, click here.

How exciting is that! I found this site about a week ago and it is fabulous!

I have big plans to make that play house for our old table that has just become my sewing table in my bedroom. I first need to finish the Easter presents. Which by the way are almost complete, I should be done tonight. Thank goodness! I'll post pictures soon.

Thursday, March 13, 2008

Easter Dresses


I remember saying in January of last year that I had a goal to make the girls their Easter dresses. It never happened. I don't know if it had to do with having a six month old, or having not used my sewing machine in months. Whatever it was, I never even thought about it after that day in January. This year, however, I knew I would absolutely make their dresses.

I had an idea in my head of what I wanted the dresses to look like. I found the fabric at my favorite fabric store and looked for the easiest pattern I could find. I modified the pattern to fit my idea. The dresses turned out to look like what I saw in my head...except I pictured sleeves. But do you know how hard it is to find a spring dress pattern with sleeves? Easter is a little early this year to have a sleeveless dress, but nothing a little white cardigan can't fix.

So I finished Gabs and still have Gwen's to complete. I said I would have them finished this week, so I better get working on it tonight! My problem is, I hate to start something and not finish it. I can't stand the thought of putting everything away, then digging it all back out again, then putting it away, etc. My house turns to shambles and dinner doesn't get made. I need a craft room! But at least I have one dress to show for it. I can't believe my mom would make 5 of everything for us girls! Two is sounding crazy at this point.

Wednesday, March 5, 2008

Easter Baskets


The last several years we have spent Easter in Utah with Joe's family. I'm ashamed to admit that we always just borrowed Easter baskets from Joe's mom for the girls. With this being our first year at home for Easter, I thought it was time to get the girls their own Easter baskets. Then the thought came to me that I should make them. And once I've had a thought, it is hopeless for me to concentrate on anything else. I was now going to make them no matter what.

I thought about making fabric baskets...that seemed much too difficult. I thought about metal pails...but the colors I found were all wrong. One day, while walking through Target I saw these plastic serving bowls for $1.99. I loved the colors. They were springy, but not too pastely. I thought about how I could do a handle, and saw a string of beads in Joann's. I remembered that we have a huge bead warehouse near by that I hadn't ever been to. I decided it was time to check it out. There were beads everywhere, and I walked out with three strands each for $2.15. I bought some memory wire to serve as the handle support.

Joe drilled the holes for me and for FHE Gabriella strung her beads on her basket. She picked the yellow basket with pink beads, Gwen's is pink with blue beads, and we even made an extra for some future date that is a blue basket with green beads. I used rub ons for their names and added the ribbon to hide any visible wire.

So here are their 2008 Easter baskets, straight from my own head (I know, shocker I didn't copy someone). Their not perfect. I wish the handles would stay standing on their own, and I wish I would have been patient enough to wait for vinyl lettering to have been ordered, but I can always replace the rub-ons with vinyl lettering later. With those few exceptions, that I will fix for next year, I am pretty pleased with the results. I'm especially pleased they only cost about $7 a piece to make. A nice, cheap, but personal project, that's my kind of project.

Friday, February 29, 2008

Dove Bib


Yesterday I ordered fabric for an Easter project I am so excited about...I'll surely post pictures when it's complete. I can't make it to the fabric store to pick up a new pattern until after naps this morning, so last night I had to do something. Being away for several weeks on vacation has left me eager to sew. So I rummaged through my scrap fabrics and pulled out some ribbon and came up with this lovely dove bib. Again, I backed it with the brown baby corduroy, but something like ribbed chenille would be so soft and perfect to wipe up the after meal mess. I hand embroidered the dove on just to add a little more homemade, personal feel. I wasn't in the mood to sew on Velcro, sometimes it just ends up looking messy, and I wasn't willing to take the time to sew a button hole, so I place the ribbon lengths in and called it good. I actually love that it ties in the back for an adjustable neck hole size. I think I'll be making more of these. I can just imagine cute, fresh, bright patterned fabric in orange and white for another bib! Now, here's a question...is this a bib for a boy or girl? I don't know, you tell me so when I give it away I'll be giving it to the right mom to be.

Thursday, February 7, 2008

Belts and Barrettes


These two ideas are easy peasy and almost not worthy of a post, but I said I would share my ideas, so here they are. Maybe my amateur attempts at craftiness will spark something in you more creative people and result in something far more brilliant.

I mentioned on my family blog that Gabs is getting less and less interested in having her hair done. Well, luckily for us, these little clipy do-dads have saved yet another battle of the wills. We have found a compromise. Ever since Gwens hair has grown long enough to hold a clip, Gabs has insisted in having a clip too. I bought Goody barrettes, scrapbooking flowers and used buttons I have saved from clothes for years. Apply a little hot glue and now you have a mom and a little girl happy with the hair wardrobe situation. I choose more spring colored flowers, but can't wait until Fall rolls around when we'll make red, brown and orange ones.

And, if you're anything like me, you see a little more of your little girlies behind than you'd like. Gabs has a serious problem, I have yet to find any pants that stay on her. So I bought d-rings and some ribbon and sewed a little seam, and there you have it. I added the floweres for fun, but they were cute without too.

So, now hopefully I'll be seeing a lot less bum and lot more groomed hair around here!

Tuesday, February 5, 2008

Crayon Roll


Another project that was so so super fast. These crayon rolls was my ticket to a peaceful sacrament meeting...unfortunately I only made one and Gwen was more interested than I expected. I need to hurry and make another before next Sunday! I went with the twistable crayons because Gabriella likes to peel the paper off normal crayons. Although that would keep her quiet and occupied for several minutes, probably not such a good idea in the chapel! I also made some with colored pencils. You can make the roll as long as you need, and each pocket size can be adjusted to fit whatever writing tools you have. I also added the pocket for paper. The instructions on how to make one can be found at http://www.skiptomylou.wordpress.com/. Fun for a gift as well!

Colored Rice


Since many of you inquired about this on my family blog I thought I'd share it here. This is not a sewing or craft project, but it is nothing fancy, and oh so popular with my girls. Ever since I made this with Gabs last Friday, she has asked to play with it every morning! We put it in a storage bin that we have here, but I think the best one would be those shallow, sweater tupperware that fit under the bed. The girls have loved filling all their bowls and cups and making "picnics." I cut up an egg carton and those have provided hours of joy as well as ice trays, especially if you have fun shaped ones. For boys, I'm sure trucks and G.I. Joes will be just as entertaining. We've also buried pennies, buttons, clips, and yarn and searched for them in the rice. So, here's how you do it, so easy...

Take a plastic baggie and add a tiny bit of vinegar...like 1 tsp. or so.
Drop a few drops of food coloring in...the more you put in, the darker the rice will turn out.
Add 1.5 to 2 cups rice.
Shake bag to coat all the rice.
Lay out on cookie sheet and put in oven for 30 minutes at 200.
Use same baggie and repeat with different color food coloring.

Total we made about 5 cups because I was out of red food coloring. I'm sure if you have a big bin, you'll need more. We just layed out a big oil cloth mat and they went crazy...what's vacuuming the house one more time than we already do anyway?

I got this idea from a a web site called write, mama write. There are millions of ideas for little toddlers.

Friday, February 1, 2008

Poodle Skirt and Mail Bag


Next Friday Joe is taking Gabriella on a daddy daughter date. There is a Valentine's dance at the elementary school down the street for girls and their dads. The theme is a sock hop, so Gabs I went to the store to pick out the felt for her skirt. She choose purple and wanted a purple leash too. I added a little pink tuille underneath to fluff it up some and give it a little someting extra. She wore it all around the house the day I made it, but you'll have to check out the family blog next week so you can see pictures of her all dressed up. She is so excited to go "dancing with daddy."

I just found a "how-to" on line. It was very straight forward and easy. Very little sewing...I even cheated and hot glued the leash and poodle on. So fun for a dress up box! Now if only I could make saddle shoes...

As for the mail bag, I found another easy, easy tutorial. I decided to go the inexpensive and free route and use muslin and ribbon I already had for the bag. But the possibilities are endless for this fun bag...bright fabrics to carry pool toys to the pool in, or a book bag for the car, or to put goodies in for your neightbor...lots of ideas. It's amazing what kinds of ideas you can find on the internet. Thank goodness for talented people out there!

Monday, January 28, 2008

Mail Center


At the first of the year, my sister e-mailed links to a bunch of things she wanted to attempt to make this year. There were so many cute things, but I fell in love with a felt mail box set. I'm a little obsessive about things. Once an idea is in my head, I really can't seem to let it go until I see it through. So, I found these tin mailboxes at Michael's for $2.99 and went to work. They also have these at the $1 spot at Target, but they're a bit smaller. I also seem to have a knack for turning a simple idea into a complicated, tedious project.

A paper mail center simple wouldn't work, and the felt was driving me crazy because I didn't care for any of the colors I saw. Finally I saw an idea where fabric was used, so that's what I stuck with. I used fabric I already had, placed pellon (a stiff felt), which I already had in between the two pieces of fabric, and used sticky Velcro, which I already had to attach the different pieces. It would have been quite simple to do, but I decided to sit an embroider everything to give it a little more flare. What started out nice and easy turned to tedious and time consuming. But in the end, I think I love it! And, it only cost $2.99, how could I go wrong?

I know Gabs will have such fun playing "mail center" with actual play mail and not just scraps of paper she finds me cutting apart for her and envelopes that bills came in! Total, the girls will have 2 mailboxes, 2 envelopes, 5 stamps, 5 letters, 4 postcards, and 6 mail recipients. The last thing I have to complete is a small bag that says "My Mail Bag" for all the loot to be stored.

I will give this to the girls on Valentine's day. Since we will not be with them for the next several days, I am going to supply my mom with stickers, candy hearts, valentine crafts, lip gloss, or anything else I can find at the dollar store. Each day my mom will put something new in the mailbox for them and say that we "sent" them mail. I hope it's a hit and helps with the separation anxiety they may be feeling!

Tuesday, January 22, 2008

Aprons

I really think aprons are the most fun things to make. I love to get carried away with ric rac and pom poms and fabric combinations. It's fun to have something a little saucy and sassy to wear in the kitchen. I made these for a few friends for their birthdays and they were so easy. No pattern, just more straight cutting and sewing. Sorry if you're sick of seeing this fabric. I'm tired of it too, but when there's a good deal you have to get lots right? I've finally finished it off, now I will allow myself to go out and get some more!
Oh, and try to ignore the cheesy pictures, I really didn't know how to best display the aprons for a decent picture! If anything, this crafy blog is helping me with my still life photography, I really stink at taking pictures without living subjects!

Friday, January 18, 2008

Placemats


My friend once said that she was raised with the philosophy that as long as there was nice dishes, candles and music, any old meal was instantly great. I always remembered that. I love sitting down to dinner with my family! Joe and I got a few sets of place mats when we were married and those have been what we have always used. Not my first choice of place mats, defiantly not my style and really they are now in terrible shape. It was about time that we ate dinner on something that was worthy of putting dishes on. I enjoy cooking and spend lots of time in the kitchen, our meals deserve some good place mats.

I really should be embarrassed about the not so difficult level of my projects, but you gotta start somewhere to get to where you want to be right? Really, this is something that any one who can sew a straight line can do. Maybe we're not quite to the candle lights and music, but who knows, maybe we can pull off a good looking place setting on Sundays.

Tuesday, January 15, 2008

Bibs


These are definitely not fancy, or original for that matter, but personalized bibs are fun, easy, inexpensive, and cute. I think these are the perfect little gifts for those friends that didn't have a baby shower because they had baby number 2, 3 or 4. Or for someone that you are taking dinner to after they've had a baby. Even for visiting teachers or teachees. Really, I just think they are perfect for that mom who has everything, but their new little baby needs something of their own.

I bought brown baby corduroy for the back, because it works with boys, girls, and unknown genders. Dig through some of your left over scrap fabric-they hardly use any, find a cute font, embroider the name, add a little ric rac and viola, you're done. I like the idea of using "bebe" for friends that don't know what they are having, or just monogramming it with the babies initials. Anyway, really don't inspect the sewing or the final product, just thought I'd share what I think is a great little gift idea.

Tuesday, January 8, 2008

Fans


I love when I can do something that doesn't cost a thing and has a huge impact. I admit I am pretty cheap when it comes right down to it...except for coats, I'll pay a pretty penny for coats. Anyway, I saw these wonderful fans on a gals blog that I knew back in my BYU days. I had to do it.

The girls room is a cozy, small square room. The room consists of old frames painted white with some of my great grandmothers doilies inside, a bed we got from a neighbor that we put new hardware and crown molding around, bedding from my mom that is on loan to us until both girls are in beds and I'm ready in invest in bed sets, a crotchet baby dress that my great grandmother made for my mom, a vintage baby cradle and highchair, a shabby chic light fixture, crib and home made baby quilts. Not a whole lot of money has gone into this room, but I really do love it's girliness and charm.

I felt the room lacked a little spunk and color, especially during these winter months, so these retro feeling fans were exactly what it needed. They were a breeze to make, and completely free, using the supplies I had right here in my house. Just what the room needed...a free makeover! Don't you just love it? I might just be adding a few to the master suite I love them so much! :)

I'll try to take pictures of the other side of the room so you can see all the nostalgia items later!

Wednesday, January 2, 2008

Ornaments

Old:
New:
I have no idea where this little ornament came from. Was it from mom, grandma, a great aunt? I don't know, but it's an ornament that I've had forever. I noticed Gabs playing with it yesterday, so I thought I could make her and Gwen their very own versions. It doesn't have quite the perfect craftsmanship as mine does, but it will do. Joe thought I was kinda crazy for making a red bird with blue and cream wings, but I wanted the ornament to reflect me and my tastes at this point. I think it's fun to look back over your ornaments, or anything and see the decades and style they represent. Most of my ornaments say 80's, but that's what they should say. My favorite christmas colors are this bricky red, and light blue. I don't know if it screams 21st century, but it certainly expresses in a small way my style. I want my girls to always have pieces of me, and this little 2007 bird ornament fits the bill.

Oh yes, Gabs reminded me that she needs a necklace too, so I'll have to come up with some way to work that out.